JetBrains has developed the IntelliJ IDEA that is used for the development and maintenance of Java applications. It is also famous for PyCharm, an Integrated Development Environment for Python.
This open-source application is regarded as a well-designed program with advanced features to check errors in your code.
IntelliJ has 3 different versions:
- Community version (which is open-source)
- Ultimate version (paid edition with extra features)
- Educational version (ultimate edition; free for students and faculty)
In this guide, we will go with the Community version as it is free and open-source.
How to Install IntelliJ on Ubuntu 20.04?
To get IntelliJ IDEA on Ubuntu 20.04, your system must have Java installed on it as a pre-requisite of IDEA.
We have two ways to install IntelliJ IDEA on Ubuntu:
- GUI
- Terminal
Installing IntelliJ IDEA on Ubuntu 20.04 through GUI:
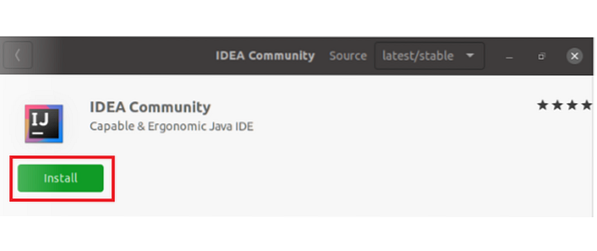
To install IntelliJ IDEA through GUI, open your Software Center, and search for “Intellij”.

Select “IDEA Community” and click on the Install button.
Once you clicked on the Install button, it will ask you to enter the password.

Enter a password and click on Authenticate button. The downloading and installation will be completed within few minutes.

2. Installing IntelliJ IDEA on Ubuntu 20.04 through Terminal:
To install IntelliJ IDE Community Edition through snap packages, open the terminal and type the command mentioned below:
$ sudo snap install intellij-idea-community --classic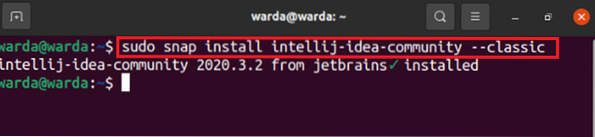
If you want to install Ultimate Edition, use mentioned command in the terminal:
$ sudo snap install intellij-idea-ultimate --classic
And for Educational Edition, use:
$ sudo snap install intellij-idea-educational --classic
How to Uninstall IntelliJ IDEA from Ubuntu 20.04?
As we have done with two installation processes of IntelliJ Idea on Ubuntu 20.04. Now, let's check how to remove them from your device.
1. Uninstall IntelliJ IDEA through Software Center
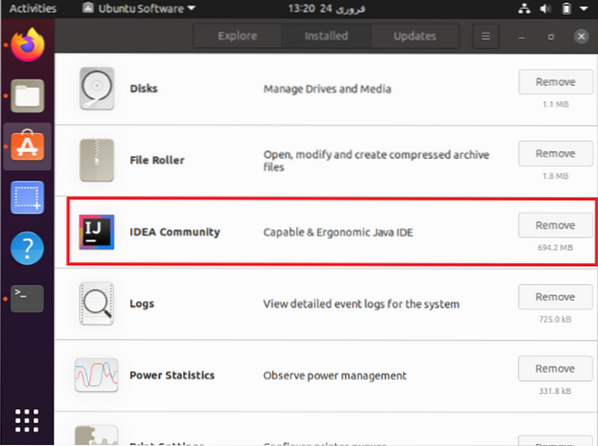
To uninstall IntelliJ IDEA from Ubuntu 20.04, open Software Center and select the Installed tab. A list of installed packages will appear there.
Select IDEA Community and click on the “Remove” button.
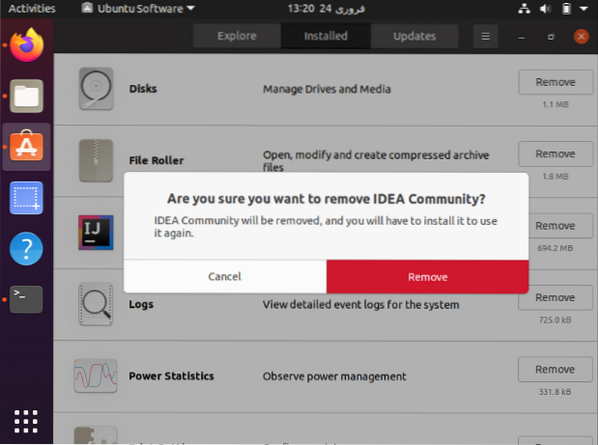
A prompt will appear to ask if you want to delete it from the system. Click on Remove to completely delete IntelliJ from your system.
2. Uninstall IntelliJ IDEA through Command-line:
If IntelliJ is installed using snap then to delete it, type the following command:
$ snap remove intellij-idea-community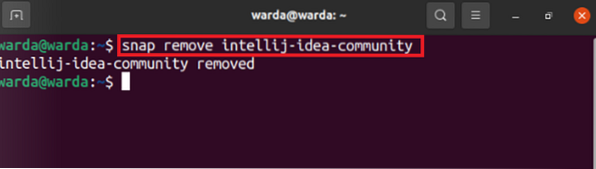
To uninstall Ultimate Version, type the following command:
$ snap remove intellij-idea-ultimateAnd to Uninstall Educational Version, use the command below:
$ snap remove intellij-idea-educationalConclusion:
IntelliJ IDEA is a free integrated development environment to develop, debug, and maintain Java applications. It has 3 different editions: Community version, Ultimate version, and Educational version. We have seen a brief guide about how to install IntelliJ IDEA through GUI and terminal and its uninstallation processes as well.


