KDE is a globally recognized organization that has made developing free and open-source work their motto. They are a community that focuses heavily on offering applications that can be made available under the open-source license.
This has, in turn, led KDE to become one of the largest Linux-based communities where artists, developers, writers, translators, distributors, and people with so many other occupations gather and work together to produce software according to their individual ideals. One such product that has become immensely popular is Kdenlive, a video-audio editor that is an excellent Linux alternative to its Adobe counterpart.
This article will show you how to install Kdenlive on Linux Ubuntu 20.04 systems. We will also take a brief look at some of the important features that come along with Kdenlive.
What is Kdenlive?
Kdenlive is a professional video editor developed by the people working at KDE. It is cross-platform, available for Windows, Mac, and Linux. Kdenlive is known for its ability to support multiple video formats, such as 3Gp, MKV, MP4, etc., in addition to providing loads of powerful features to its users. Some of the most prominent features include multi-tracks for audio and video editing, a variety of effects and transitions, and customizability.
All these features make Kdenlive a powerful software, which is why its name is among the top Linux-based video editors.
Installing Kdenlive
Ubuntu offers multiple ways for users to install Kdenlive on their computer. Let us look at some of them:
a) Installing Kdenlive using Snap
The simplest way of installing Kdenlive is by using the Snap store. Snaps are packages that belong to the Snap package manager developed by Canonical for Linux OS.
The advantage of using Snaps versus other repositories is that it does not rely on any particular app store, and these programs are available for all Linux distributions. To install Kdenlive using Snap, simply enter the following command:
$ sudo snap install kdenliveb) Installing Kdenlive using the PPA Repository
Snaps, however, has faced several criticisms regarding instability. A better alternative for this is to install Kdenlive by using the PPA repository.
To do this, open the terminal via Ctrl+Alt+T or by searching terminal in the Ubuntu Dash. Once the Terminal is opened, enter the following command:
$ sudo add-apt-repository ppa:kdenlive/kdenlive-stableNext update your systems by running the following command:
$ sudo apt updateFinally, enter the following command to install Kdenlive onto your Ubuntu system:
$ sudo apt install kdenlivec) Installing Kdenlive using the AppImage
Another way of installing Kdenlive is by using the AppImage. This allows users to run applications as they would run in Windows. To use this application, go to the official website of Kdenlive and click on the download section.

Next, click on the AppImage button, which will start downloading your file.

After downloading the file, go to the directory where you downloaded it and run the following command to give it an executable status:
Now, double-click on the AppImage file, and Kdenlive will start.
Using the Kdenlive Editor
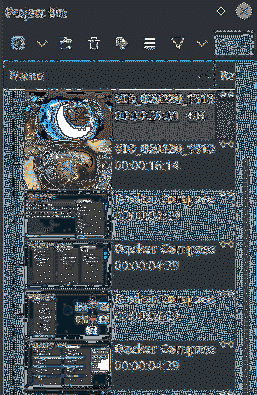
Kdenlive is extremely easy-to-use and offers a very user-friendly interface. First, you will need to add all the videos needed for editing into your Project Bin, which can be found on the left-hand side of the editor.
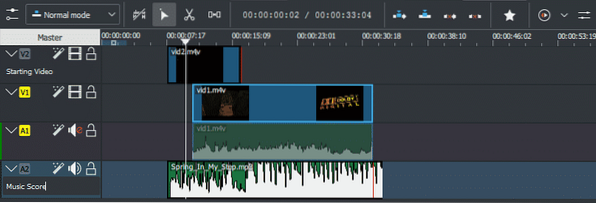
One of the best attributes that come along with Kdenlive is its support for multi-track editing. This allows users to easily edit and work on several video and audio tracks at the same time. Kdenlive also allows you to mute a specific audio track, add markers, lock tracks, and even hide a video track. These tracks can be dragged around or resized, and segments of it can be cut. All of the available tracks can be seen in Project Bin in the image above.
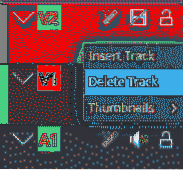
You can also add more tracks into your editor or delete the extra or unused ones. Right-click on any track and these options will appear.
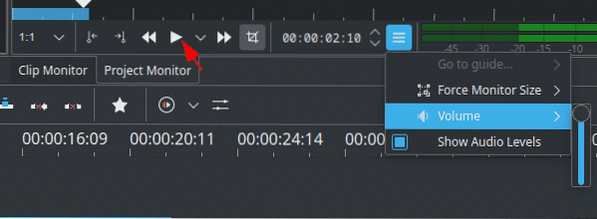
To check if your audio and video work together, you can run the edited version by clicking on the play icon, as shown in the image below:
To add effects to your editing files, Kdenlive offers a vast range of effects, which are further divided into multiple categories of video and audio.
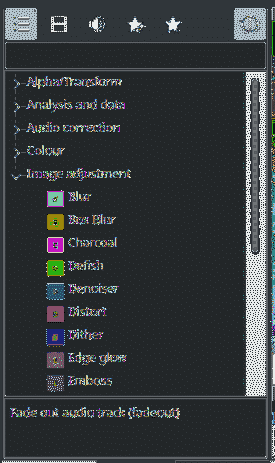
To add these effects to your tracks, simply drag any of these to your video and audio tracks, and you will be able to see and hear the change take place. For example, in the following, we added the Fade Out effect to one of our audio tracks:

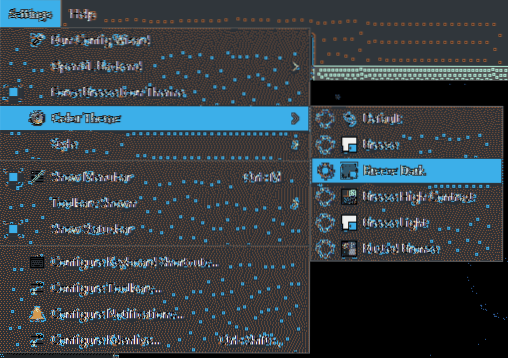
If you want to change the theme of the editor, you can do this by going to the Settings tab and opening the Color Theme section.
Why Use KdenLive?
Kdenlive is one of the most popular Linux-based editors out there. It is extremely stable and offers an immaculate performance without slowing down or stopping when adding effects or dealing with large sets of files. With each new release, it looks and works much better than its former self. The KDE Team has done a fine job putting out a top-quality non-linear editor for Linux.


