One excellent feature that atom supports is it Git and GitHub. You can
- create new branches
- stage and commit
- Push
- Pull
- resolve merge conflicts
- view pull requests and so much more, all from within your editor
The GitHub package is already bundled with Atom, so you can start right away.
The only downside for Atom text editor is that, it can be noticeably slow and can not be very good for heavy files, as that slows down it's performance most of the time.
In this article we are not only going to discuss, how to install Atom but also how to install packages and the working of Atom text editor.
Step by step Installation of Atom Editor
Firstly, you'll have to go to Atom editor official webpage using the this link. Following page would be displayed to you.
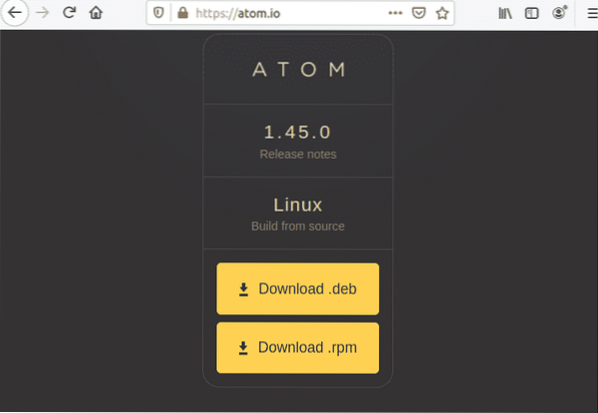
Click on 'Download .deb' and save the file in your desired location, for me it's 'Downloads'.
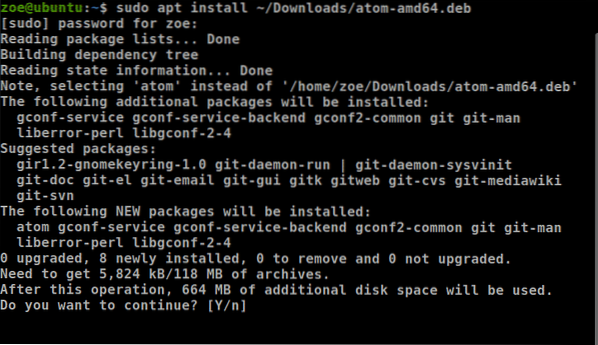
After your file is saved. Open your terminal and run the following command to install the package.

The installation process would start.
You can also install Atom via snap. But for that to work, make sure snap is installed on your system. To install via snap, use the following command

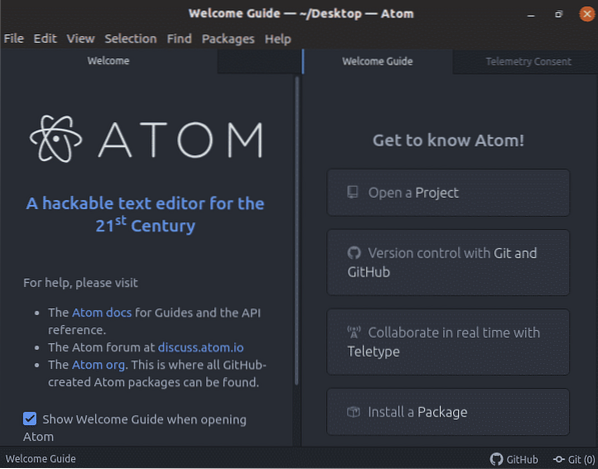
Once the installation is complete, launch Atom. Following would be displayed.
A guide to install packages on Atom Editor
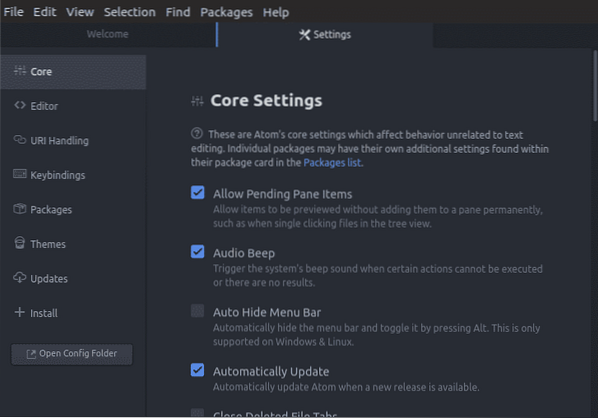
As we have discussed, Atom editor is famous for its ability to be tailored to user's requirement. To do that, follow the given steps
Click on the 'Edit' button in the menu bar and navigate to preference
Click on 'Preferences', you'd see the following screen
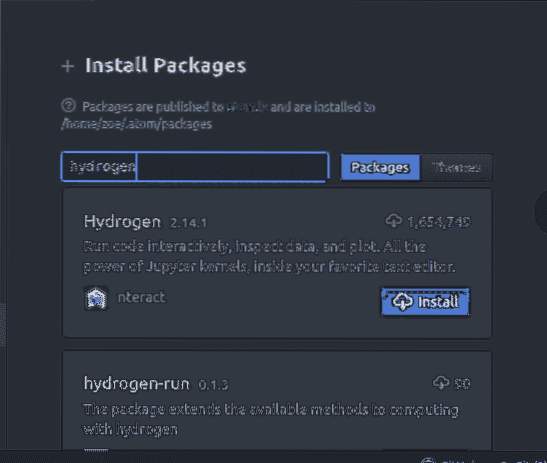
Now Navigate to 'Install' and click on it. A search box would appear. Write the name of package. Your desired package would be installed in '/home/zoe/.atom/packages'.
How to select text, copy text and paste text?
Selection of text is required for us to copy, format, delete and move. Just about all editing and formatting job begins through selecting something. The easiest way to select text is through pressing 'Shift' + '↑'
To Copy text use, 'Ctrl'+ 'Insert'
To Cut text, click 'Shift' +'Delete'
And to paste text, use 'Shift' + 'Insert'
How to use 'Autocomplete' in Atom?
Autocomplete, or word completion, is a feature that everyone is familiar with as almost every device supports it and we often rely on it. A text book definition would be 'application predicts the rest of a word a user is typing'. It works for Atom as it does for any application, user typically enters a few characters and the application suggests keywords.
An example is shown in screenshot below

How to create and use snippets?
Atom has an excellent feature 'built-in code snippets. It should be noted that Atom only shows you snippets for a particular scope for which you're coding. For example, if you are working on a file with .html extension, only snippets belonging to the HTML will be available for that file.
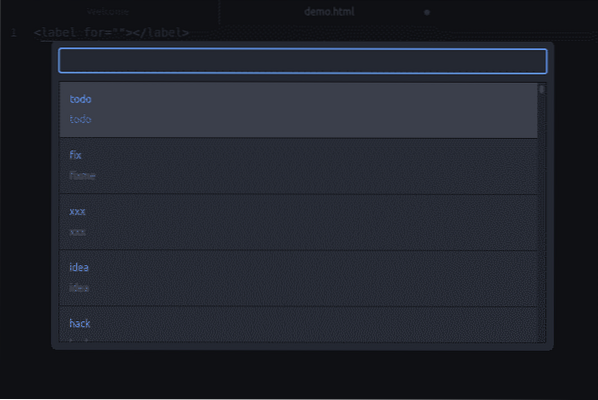
To check all snippets for the current scope, click on 'Packages' and then select 'Snippets'
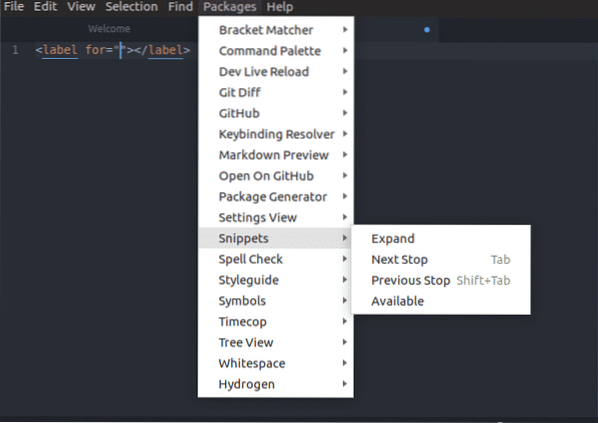
By selecting a snippet from the drop-down list, Atom inserts the entire snippet into the editor without any further ado. Below screenshots show screen for selection of 'todo'

To create a new snippet
To create a single-line code snippet, you are required to add to the snippets.cson file
- the scope
- the name
- the prefix
- body of the snippet
Following is an example for its syntax.
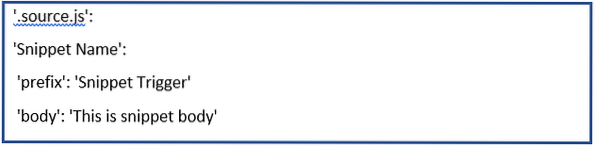
Example

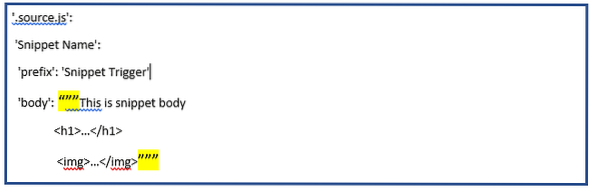
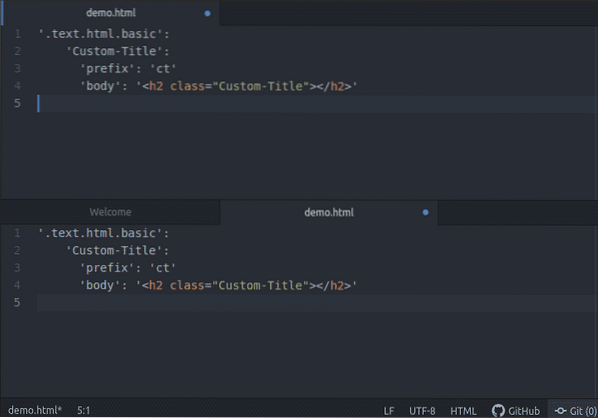
In the above given screenshot, what we are doing is that, we are making a snippet that will add an
tag with the class 'custom-title' to the HTML scope.
Now after typing the above example, save the configuration file. From now on, whenever you'll type the prefix and click the Tab key, editor will paste the snippet body. Notice that autocomplete result box shows the name of the snippet.
Multi-line code snippets are same as that of single-line however it uses a bit different syntax. The data used would be same.
However the difference here is that the snippet body will be surrounded by three double quotes i.e. “””
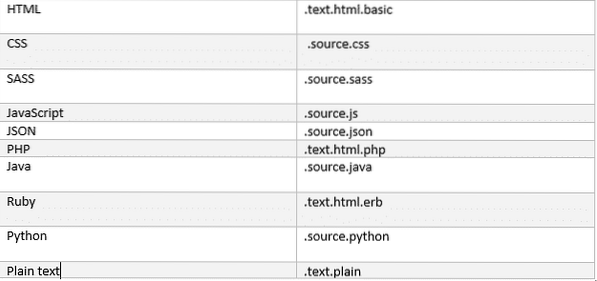
In snippets.cson, the snippet must have a dot/period added at the start of that string. Common web-language scopes include:
Search and Replace
Searching and replacing text in your file or project is quick and easy in Atom. Following are the commands used.
'Ctrl'+'F' - This command will search within file.
'Ctrl'+'Shift'+'F' - This command will search within the entire project.
By using any of these commands, you'll see the following UI with the panel at the bottom of screen.

To search within your current buffer,
- you will press 'Ctrl'+'F',
- type in a search string and press Enter
- press 'F3' to keep searching in that file.
- 'Alt'+'Enter' will find all occurrences of the search string
If you type string in Replace textbox, it will replace the text with the string text.
How to work multiple panes?
Editor pane can split to horizontal alignment or vertical alignment. For that action,
- Use Ctrl+K + ↑
- Use Ctrl+K + ↓
- Use Ctrl+K + ←
- Use Ctrl+K + →
The direction key shows the direction in which you want to split the pane. Once you split panes, you can move between them with the above commands, and it will focus on its respective pane.
The below example for splitting screen in above direction.
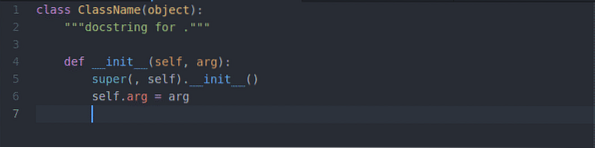
Syntax highlighting for python
For this to work, firstly make sure you have 'Langauge-python' package enabled. Afterwards, open a python file, for example here I am using 'demo.PY'.
You'd notice that syntax highlighted, thus refining the readability of the text; especially for codes that could span to numerous pages. Below is an example,
Moving in Atom
While it is quite easy to move within Atom, you will always need some help regarding key binding shortcuts that will save you a lot of time. Here is a link for the most common movements within the Atom along with some other amazing shortcuts.
Git and GitHub with Atom
For Git operations, you don't need to install anything further. Atom by default contains integration for git. Atom consist two tabs, tab one for Git and tab two for GitHub.
One way we can access them either by clicking the 'View' and selecting Toggle Git Tab / Toggle GitHub Tab menus in the top menu bar. Another alternative is hotkeys.
- Git Tab: 'Ctrl' + 'Shift' + '9'
- GitHub Tab: 'Ctrl' + 'Shift' + '8'
To create a new repository, click on 'Create Repository' button, enter the name the repository and then click on 'Init' button.
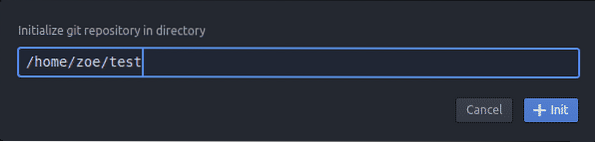
And that's was the process of initializing your git repository.
So now you'll notice a UI like following
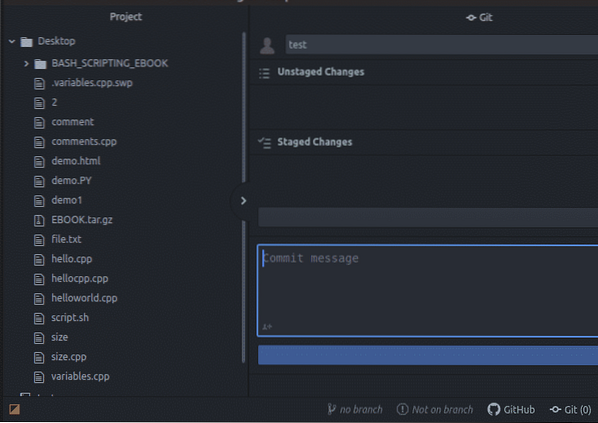
The staged and unstaged changes are shown below each other on the side of the screen, also one can make a commit at any moment.
So that's how Atom editor facilitates developers and becomes a worth-while user experience. This article gave you an insight of how cool Atom editor can be with all of it's features that brought revelation among programming community. Thank you for reading this article.


