Creating and managing virtual hard disk (VHD) is simple with the all new Windows 7. Windows 7 lets you create and attach a virtual disk without using third-party application. Unlike earlier versions of Windows, Windows 7's Disk Management comes with powerful tools to create, attach, and detach (Virtual Hard Disk) tools.
We have already shown you how you can create a VHD in Windows 7 without using any third-party application.
As mentioned earlier, you can create and manage VHDs via Windows Disk Management tool.
How to create a VHD in Windows 7:
1. Open Windows Disk Management either by typing disk management or diskmgmt.msc in start menu.
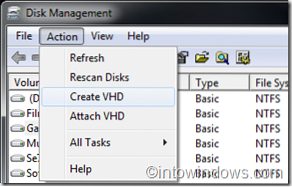
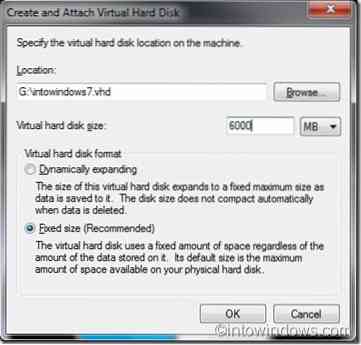
2. In Disk Management's Actions menu, select create VHD option. Browse to the folder, specify virtual hard disk size, type and click ok. You can find detailed information on creating a VHD in our how to create a VHD in Windows 7 post.
How to attach a VHD in Windows 7:
1. Attaching a VHD is very simple. To do this, again go Disk Management > Tools and select attach VHD.
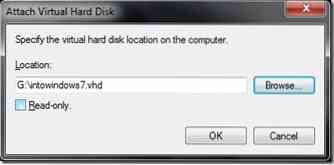
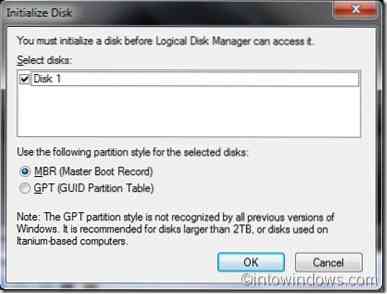
2. Browse to the VHD location that you have created earlier and click ok. To use this VHD, right-click on it and select Initialize.
How to detach a VHD in Windows 7:
1. Once again, go to Disk Management, right-click on the VHD and select detach VHD.
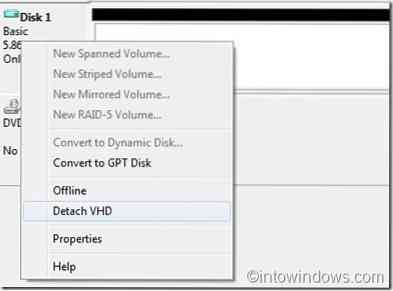
2. Click ok.


