
NFS, short for Network File System, is a distributed file system protocol. It can help you share files and entire directories with others over a network. It allows programs on remote systems to share and access information with each other as if it was available on a local machine.
NFS works in a client-server environment. That is to say, if you want to set up NFS to share files between two systems, then one of them needs to be configured as a server and the other as a client.
The server functions as an admin that authenticates and authorizes the client(s) to access the shared data. Almost any number of clients can get access to the shared data as simple as any other file or directory in their local storage.
How to setup NFS Server on Ubuntu Server
So if this has got you interested, we have put together a detailed step-by-step tutorial that will guide you on how to install and set up NFS Server on Ubuntu so you too can start sharing data with other client systems. It is divided into sections, the first part discussing how to set up the host server and the second part showing you how to set up the client-side. For this tutorial, we will be using Ubuntu 20.04 LTS.
Configuring the Host Server
To set up the host server, you first need to install the NFS Kernel server. Once done, you can create and export the files and directories that you want to share with all the client systems.
So let's get to it.
Step 1: Installing the NFS Kernel Server
First things first, we need to install the NFS Kernel Server package on the Ubuntu system that is going to function as the server. But before that, just to make sure nothing goes haywire during the process, let's update the system packages.
To do this, type in the following command in the terminal:
$ sudo apt update
With all the system packages updates, it is time to install the “nfs-kernel-server” package using the following command:
$ sudo apt install nfs-kernel-server
This is also going to install some additional packages on your system, including “nfs-common” as well as “rpcbind” which are necessary to set up file sharing.

Step 2: Create NFS Export Directory
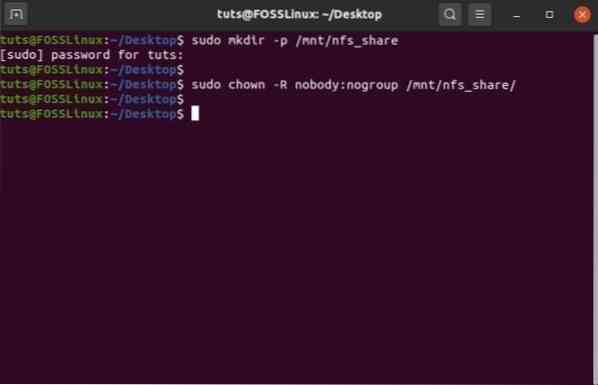
With the “nfs-kernel-server” package installed, you can now create an NFS export directory (simply known as the “export directory”), which is going to be shared with all the client systems. To do this, type in the following command inside the terminal.
$ sudo mkdir -p /mnt/nfs_share
All files that you want to be accessible to the clients needs to be created inside of this directory. Since we want the client systems to have full access to this shared directory, we need to remove all directory permissions that are restricting access.
This can be done with the following command:
$ sudo chown -R nobody:nogroup /mnt/nfs_share/
When done with the above command, head over to the next step.
Step 3: Assign NFS Server Access To Client Systems
With the export directory ready, you need to provide permission to your clients' systems to access the host server. This permission is defined inside the “exports” file that's located inside your system's /etc folder.
You will need to edit this file and add a few extra lines of commands to give your clients' systems access to the export directory. As such, open it using the Nano editor by entering this command into the terminal:
$ sudo nano /etc/exports
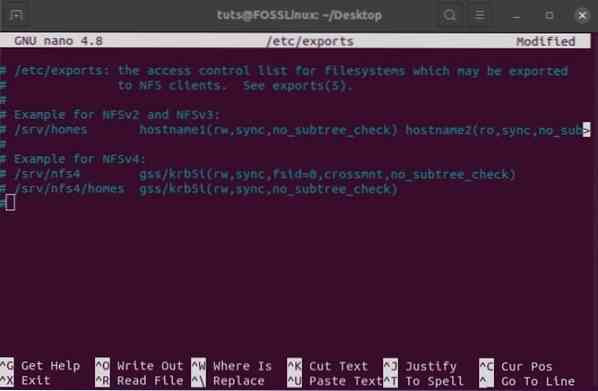
From here, you can provide NFS server access to either a single client, several clients, or the complete subnet. For this read, we will be providing the entire subnet access to the NFS share.
To do this, you will need to add this line to the “exports” file.
/mnt/nfs_share subnet(rw,sync,no_subtree_check)
Here you need to replace your system's subnet in the provided placeholder.
Besides this, here is what the other parts of the command mean:
- rw: read/write command
- sync: changes are made to the disk first before they are applied
- no_subtree_check: removes subtree checking
However, if you wish to grant access only to a single client, you can do so by using the following syntax:
/mnt/nfs_share client_IP_1(rw,sync,no_subtree_check)
Whereas to add multiple clients, you need to do so one by one:
/mnt/nfs_share client_IP_1(rw,sync,no_subtree_check) /mnt/nfs_share client_IP_2(rw,sync,no_subtree_check)
With the client system having access to the NFS server, it is time to move on to the next step.
Step 4: Export the Shared NFS Directory
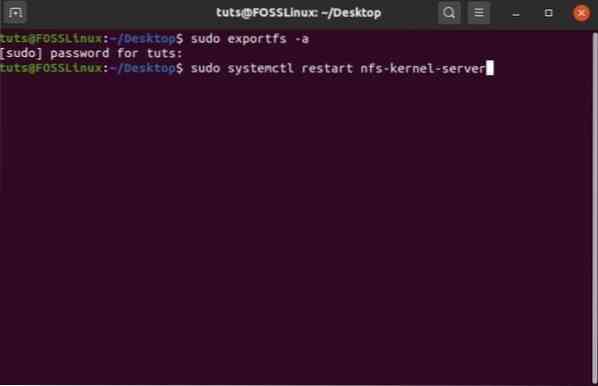
With all the above configurations in place, it is time that you export the shared NFS directory and makes it available to the client systems.
This is quickly done using this command:
$ sudo exportfs -a
This is followed by restarting the NFS kernel server to make sure all the configurations take effect.
It's finally time to move on to the last step of this setup.
Step 5: Allow Clients to Pass Through the Firewall
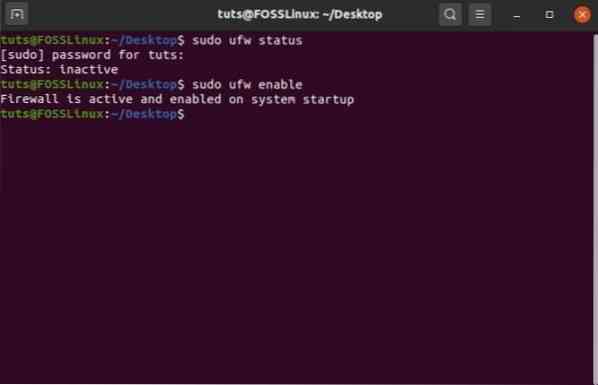
Even after giving clients access to the NFS server and exporting the shared directory, clients still won't be able to access the files if blocked by the firewall. As such, you will need to open up the firewall for your clients. Your Ubuntu PC already has a default firewall - the UFW (Uncomplicated Firewall).
To check if it's running on your system, you can type in the following command:
$ sudo ufw status
If it shows that it's inactive, you will need to turn it back on using this command:
$ sudo ufw enable
However, if for some reason it is not installed on your system, then you can use this command to install it:
$ sudo apt install
Once you have UFW installed and enabled on your Ubuntu system, you will need to configure it such that it allows access to your clients.
Since we provided NFS access to the entire subnet, we need to use this command:
$ sudo ufw allow from subnet to any port nfs
However, if you only allowed NFS access on a per-client basis, you will need to input the client IP like this:
$ sudo ufw allow from client_IP_1 to any port nfs
And that's it! You have successfully installed and configured the NFS service on the Server computer.
Configuring the Client System
Next, we will need to install and set up NFS on the client system to access the shared directory. Similar to before, here is a step-by-step guide to help you out.
Step 1: Installing the NFS-Common Package
While setting up the client system for NFS share, we need to install the “nfs-common” package. Just like before, you should first update the system package and then install nfs-common using the following commands:
To update packages:
$ sudo apt update
To install the nfs-common package:
$ sudo apt install nfs-common
Once done, move on to the next step.
Step 2: Create a Mount Point
Next, you will need to create a mount point. It will be used to mount the NFS shared files from the NFS server. To do this, type in this command in the terminal:
$ sudo mkdir -p /mnt/nfs_clientshare
Step 3: Mount the NFS Shared Directory on the Client System
The folder that you created in the above step-functions like any other folder on your system. To access the NFS shared directory from the host server, you will need to mount it to this new folder: “nfs_clientshare”.
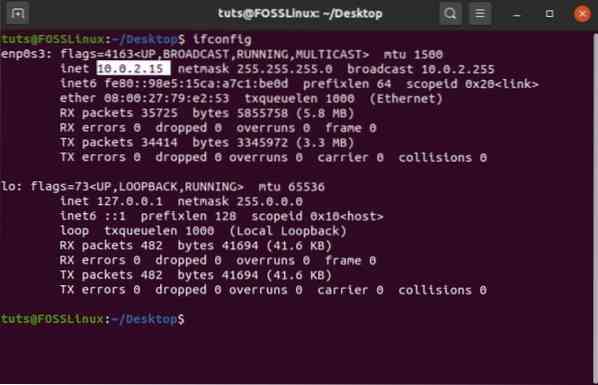
To do this, first, you need to know the NFS server's IP address. Type in the following command in the terminal of the server system:
$ ifconfig
It will bring up the network interface configuration. The server's IP is the one given under “inet,” which in our case is 10.0.2.15.
Using this IP, type in the following command in the terminal of the NFS client to finally mount the NFS shared directory to the client system:
$ sudo mount 10.0.2.15:/mnt/nfs_share /mnt/nfs_clientshare
Step 4: Test the Connection to See if Everything is Working
By following the above steps in order, you have successfully created an NFS server for sharing files and folders between a server system and multiple client systems.
All that remains is to check if everything is working correctly.
To do this, create a new file in the NFS shared directory that's on the server. You can do this by using this command:
$ cd /mnt/nfs_share/ $ touch file1.txt file2.txt file3.txt
Once done, check on the client system to see if these files show up on the NFS shared directory using this command:
$ ls -l /mnt/nfs_clientshare/
If you see the files - “file1.txt”, “file2.txt”, and “file3.txt” in the list, then the NFS server is working, and you can now start sharing and receiving files between the client and server systems.


