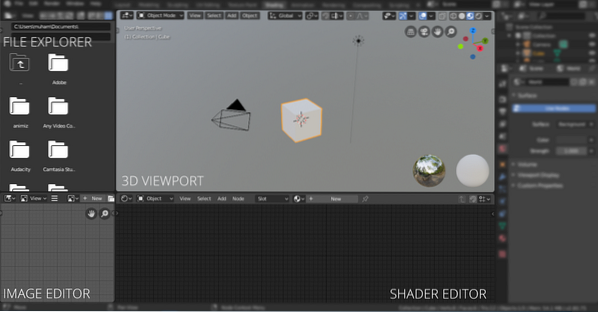
Shading is an act of adding shade to a drawn object to give it a look and a perception of depth. Nobody likes white bland 3D objects. In 3D modeling, it is very significant to give objects some color material or texture. The process of adding shades to color materials and textures is called shading. Shading is so essential in 3D modeling that Blender has a dedicated workspace for shading.
Shading workspace will automatically bring us in the “Look Dev” mode. Look Dev mode approximates lights and gives a general idea of the output of the object or scene. The shader editor will show the shader nodes of the selected object. Every object in Blender can be assigned a default material with white shading. And these shaders can be manipulated in the Shading workspace. You can add material to any object by going into the material tab.

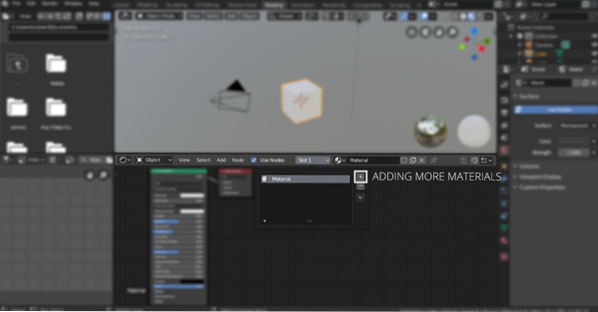
You can edit the shader of every material you created in the scene. You can change material from the “Slot” menu if there are several different materials in the scene. To edit the material, select the material from the “Slot” drop-down menu. Note the material can also be added to the layout workspace.
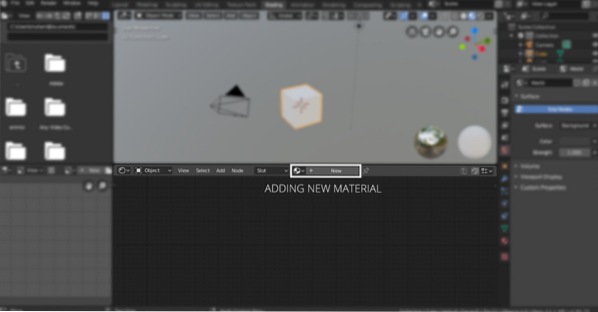
You can add more material by clicking the “[+]” button or click new. The world also has shader, which can be manipulated by selecting the world in the “Object” drop-down menu, as shown in the following image:
Shading workspace also has a file explorer window, which can be seen in the following image:

This file explorer is quite convenient to navigate and adding image textures and other materials to the scene.
The most important thing in the shading workspace is the shading editor, along with the 3D viewport and file explorer. A shading editor is a node editor specifically designed to edit the shader nodes. Nodes are a bit complex but very powerful to customize the materials. Navigating in the node editor is similar to navigating the viewport.
In node editor, you can add different nodes, like gradient ramps, noise, textures, normals, etc. To add a node, just click on the “Add” button, and for hotkeys, just press “Shift A” you can even search nodes by clicking on search because not every node can be seen in the drop-down menu. Every object has a default shader node, which can be modified by adding materials and textures. All these nodes combine and end at the single output node.
Now let's learn how to add different shaders:
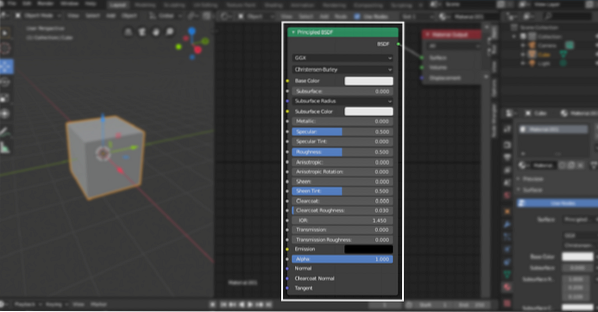
When you add a new object to the scene, you need to add material to it. That material has a “Principled Shader“. A principled node has all fundamental values which can be modified to get the desired result. For example, the material color can be changed, metallic, specular, and roughness values can be adjusted to get the desired output. The “Principled BSDF” node is shown below:
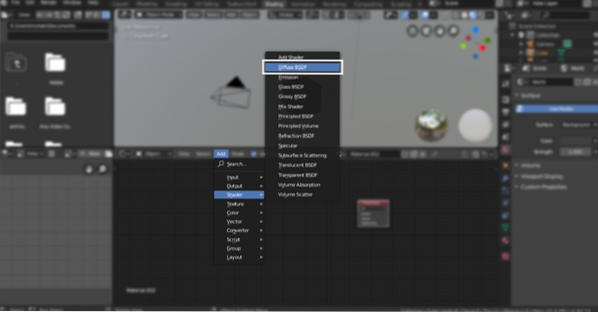
Output node will stay there; let's take a glance at some other nodes. Let's add a “Diffused BSDF” shader. Click on “Add” and “Shift A,” then go to “Shaders > Diffused BSDF“. As the name suggests, it is a diffused shader with only a “Roughness” value to manipulate.
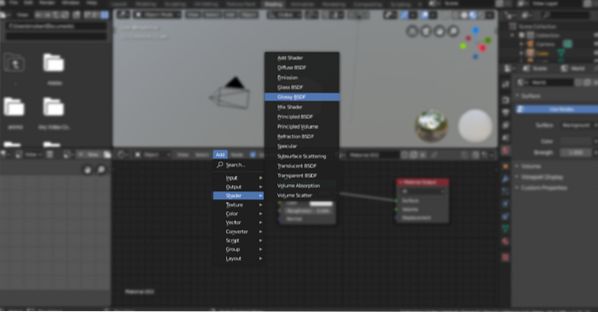
To add the glossy shader, repeat the same process, and select “Glossy BSDF“. To give a metallic look to the material, a “Glossy” shader is used.
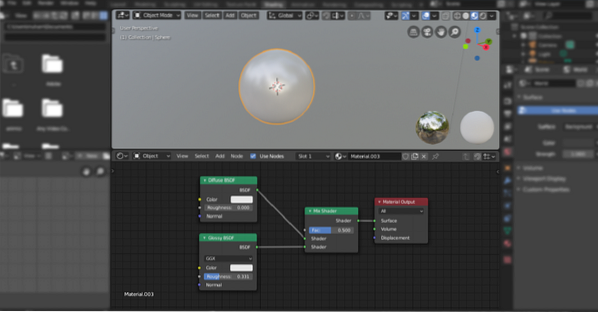
But what if we want to combine two shaders and get single output. Here comes the “Mix Shader” node, as shown in the following image:
Gradient ramps are essential when it comes to shading. Now let's see how to add gradients to the objects and how the node tree of the gradient ramp would look like.
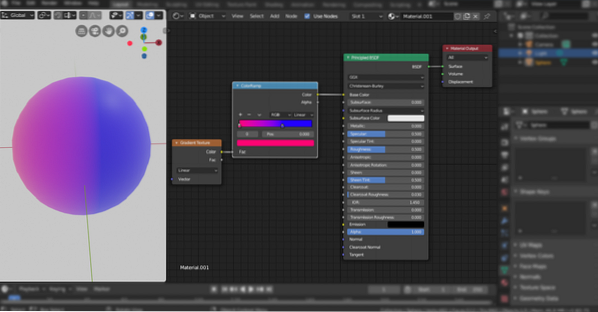
So, add any shape, I am adding a sphere. Then go to Shading workspace, you will see an output node and principled BSDF node.
Now add gradient ramp node, “Shift A > Search > ColorRamp”. Join this node with Principled BSDF; you would not see any distinct change. Now add gradient texture node “Add > Texture > Gradient Texture“. A gradient will be added to the shape; you can change the colors from the “ColorRamp” node.
Conclusion:
There are many more combinations that can be made using these nodes. Blender shading nodes are a very powerful way to shade any object. It is a bit intimidating and complex, and mathematical know-how is recommended. But it is essential to learn these shading tricks to become a good 3D artist.


